Lightning in the lens: tips and tricks for photographing thunderbolts

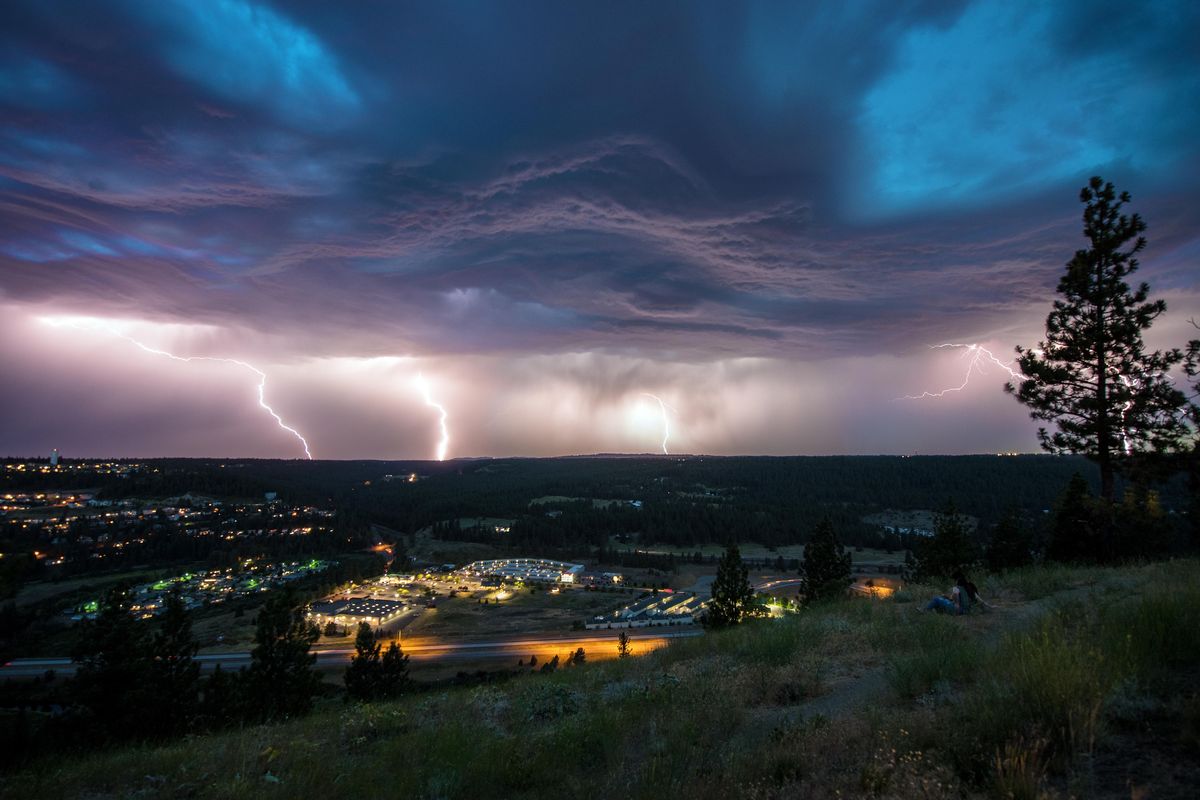
The summer storm that struck the Spokane area Tuesday evening did more than just start fires and spark power outages. It also provided area photographers with a brilliant, powerful and potentially dangerous subject: lightning.
Several amateur and professional photographers in the Spokane area captured the storm’s power in a series of stunning photos.
Which begs the question: What’s the best way to photograph an electrical surge (lightning) that moves about 320,000,000 feet per second (220,000,000 miles per hour)?
In short, it takes preparation, technical know-how, the right gear, patience and a solid dose of luck.
Here are some tips and tricks from four area shooters who specialize in nature and landscapes photography. Their responses have been edited for clarity and length.
Tiffany Hanson
“As far as shooting lightning, there’s a few different approaches you can take. Often, I’ll do long exposures and hope lightning goes off in that time frame and where my camera is pointed. With this method you can keep your ISO lower, have a high F stop and do 20+ seconds depending on the light in the foreground. Last night I did faster shots with ISO 800, and just kept clicking the camera hoping for lightning to happen. You’ll end up taking a bunch of photos and only a handful will work out, but that’s the nature of lightning photography.”
Craig Goodwin
“The technique I use is to set the ISO and aperture to allow for a long exposure. You never know when a lightning bolt will strike, and so the longer the exposure, the more likely you are to catch the lightning in the frame. I also try to track the movement of the storm and lightning activity, and move the camera accordingly. It’s also really important to be safe. When I took this photo, I was safely in my car, with the camera set up outside the car taking the photos.”
Mike Busby
“This was a series of photographs taken for 30 seconds each at F11, ISO 100. The photo came together with the storm away in the distance and then slowly moving toward me while having perfect light. So I was fortunate to have a good position, time and light.
“Thirty seconds has always worked well for me. The real key is get ahead of the storm, out of the rain and wind, and then record it as it moves toward you.
“The significant caution is to always know where safety is. The storms move fast and you do not want to be out in the open with a tripod and electronics.”
Joanie Christian
“I had my first foray into it myself last night and got OK results and a lot more ideas of the where and how for next time. I had just returned home from work in Spokane and wasn’t aware of what was coming, I wish I would have been somewhere else at the time. Though some point and shoots can get a photo of lighting without a tripod, the best images come from using a tripod, and using a remote to do a longer exposure that captures multiple lightning strikes in the same image. It is a luck of the draw type thing what you capture. I’m more cautious than some, I think, though. Protecting gear from rain and wind are factors as well. Unless you have a rain cover for your camera, rain drops can get on the lens and ruin images, too. Lots of variables to navigate!