Ask The Builder: Low-voltage deck lights are an easy DIY installation

Installing low-voltage lighting around a deck is quite easy. The soft lights create a magical mood and provide safety on steps. (Tim Carter/Tribune Content Agency)
Q. I’m going to tackle rebuilding my deck soon and have seen lots of photos of low-voltage deck lighting. I’m afraid of electricity and don’t feel I have the skills to do this part of the project. Can you impart any wisdom that will instill the courage in me to try to do this wiring? Have you worked with an easy DIY system? – Becky, Riverside, California
A. Not a week goes by that I don’t get a question about electricity from a person visiting my website. Many fear lots of things and having respect for invisible electricity is quite understandable.
You may be like Becky. You may want to try to work with electricity but need someone like me to tell you to be brave. The good news is all the wiring needed for a typical low-voltage deck project can be done with no power connected to the circuit.
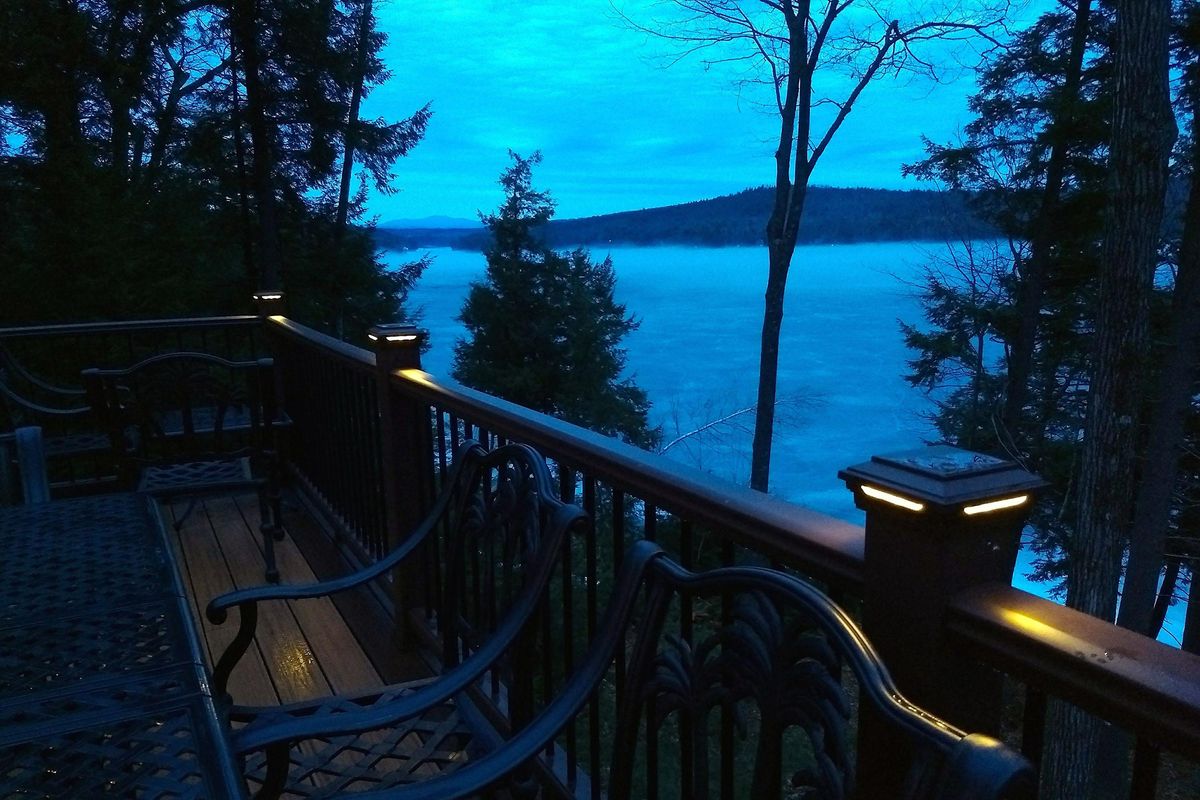
That’s how I wired up my enormous outdoor deck last year. I’ve got soft LED lights on all four sides of each post cap along my 100-plus-feet of my deck railing, and I’ve got down-facing safety lights at each stair riser. All of the lights and wiring were installed with no electricity at all in the thin low-voltage wires.
I happened to use the low-voltage lighting system manufactured by Trex. The engineers who devised the system made it caveman simple. It’s all plug-n-play. It’s impossible to make an incorrect connection.
All you have to do is connect the lights in a series. There are tiny splice-block connectors that the wires plug into as you daisy-chain all the lights together. Trex provides a handy illustrated manual that helps you make all the right connections.
A transformer converts the normal household 120-volt AC current to low-voltage DC current. After you have all of the low-voltage wires connected to the lights, you plug in this transformer into a photo-voltaic timer just as you’d plug a toaster into a wall outlet. It’s completely safe. The timer plugs into a regular GFCI exterior outlet that you might hire an electrician to install for you under the deck.
Be sure you use special rust-proof tiny cable staples to attach the low-voltage wires to the underside of your decking. Becky can do it, you can do it, and I can’t wait for you to reach out to me with your success story!
To help you visualize how simple it is to install the low-voltage lights, look at my collection of superb photos showing my low-voltage connections and parts on my own deck. Go to: http://go.askthebuilder.com/lowvoltage.
Q. Last weekend I was involved in a spirited debate with my husband about building a privacy pergola that would make our small backyard more attractive and private. He insists the pergola needs to have four posts spaced like a table to be stable, but I feel it can be more like a fence with just two or three posts in a row. Pick a side and join the fray! – Kelly, Columbus, Ohio
A. Every time I get a message or email like Kelly’s, I have flashbacks about back-and-forth building and remodeling discussions with my wife. The memories are so vivid I have to shake my head to clear them away. I discovered many moons ago it was in my best interest to find a way to make her dreams come true. Maybe that’s one reason we’ll be celebrating our 44th anniversary this September!
If you made the connection between a privacy fence and a smaller pergola like Kelly did, congratulations. Not only can you build a small pergola with two or three posts in a row, but it can also be moored to the ground so it won’t blow or fall over.
The pergola cross members that are connected to the top beam can be up to 6-feet long. It’s important to realize they should be centered on the beams that are going to be connected to each side of the vertical posts for the greatest stability. However, you can cantilever the pergola cross members using a 2:1 ratio for more shade on one side of this privacy structure.
To ensure the pergola will not tip over, the posts need to be embedded in the soil no less than 30 inches if the height of the pergola is above 8 feet. The higher you go in the air, the deeper the posts should be embedded in the ground.
You don’t have to surround the posts with concrete. Concrete becomes a liability in the future if you have to replace a post. I’ve had great success using crushed angular gravel. I surround the post on all sides with at least 4 inches of the gravel. The gravel ranges in size from sand up to pieces not much larger than a big grape.
If you want to see gorgeous photos of a pergola that Kelly will be having her husband build for her, go to: http://go.askthebuilder.com/pergola.
Tim Carter can call you on the phone for free to solve your problem. Go to his website and fill out the form on this page: https://www.askthebuilder.com/ask-tim/.