Skating rink for dummies: step-by-step guide
The day after Christmas, my kids discovered the small water hole I’d dug into the hillside to attract doves had frozen over.
Amazingly enough, it kept them occupied for more than 3 hours. I marveled at how a 4-by-6 foot section of ice could do what no parent could, and thought, what might something larger do? Would it free them from their cell phones and video games? Would it free me from listening to proclamations of boredom, or requests for transportation to the mall?
So exciting the prospect, I proclaimed aloud, “I’m going to build an ice skating rink!” The kids cheered in unison. I wondered what I’d just done.
Although I’d assured the kids it would be an easy weekend project, my head swam with doubt. Truth be told, I had trouble constructing a simple picture frame – how would I build a skating rink? You may as well ask me to reconstruct the Great Pyramid.
Fortunately, this world holds much smarter, more confident people than I. With the help of Google, YouTube and the parents of my son’s hockey buddies, I was able to settle on a design that suited my needs and poor skill set.
Location and size
As suspected, size does matter. Rink size depends on available resources for location, but having more land isn’t necessarily an advantage.
While a much larger rink could be built on a ten-acre parcel than a city lot, this may not be the best decision. A regulation 200-by-85 foot hockey rink may sound ideal, but unless you have the resources – space, construction materials, access to a water source, power receptacles and possibly a Zamboni – the best bet is to keep it simple and within your means.
A smaller rink can be just as much fun, goes easier on the pocketbook and doesn’t require a county survey or permit. For some, the yard may provide the only viable option for a skating rink, but excavation of your landscaping may not sit well with your significant other.
In this case, a temporary skating rink is a perfect alternative. It can be set up seasonally in a relatively small space with minimal materials, close to water and power, and it won’t negatively impact the land.
Vegetation, such as grass, goes dormant in the winter, anyhow. A skating rink over top won’t cause any additional harm.
Site preparation
Site prep is the foundation for overall success.
If your rink requires groundbreaking, plan ahead and finish before temperatures drop and the ground freezes. Once this occurs, your options become limited.
We selected a temporary style skating rink to be built on top of the frozen ground, making site clearing with a snow blower and shovel easy. A clean and level site will ensure even ice coverage and minimize the potential of damage to the liner.
Our leveled site had less than a 3-inch drop and was picked clean of all rocks, sticks and ice chunks. A little elbow grease during this stage will pay dividends in the end. This is what kids are for.
Materials and design
The rink was designed using 10-foot sections of 4-inch PVC for the frame and liner caps, including enough elbows and couplers to make the required connections. Glue is unnecessary; the frame is intended to be taken apart and stored for repetitive use.
A frame could easily be constructed from new or recycled lumber, but PVC is relatively inexpensive, durable, and easy to cut and assemble. No angles or complicated measurements are required, and most cuts can be made with portable handsaws. A table saw is highly recommended for manufacturing the caps.
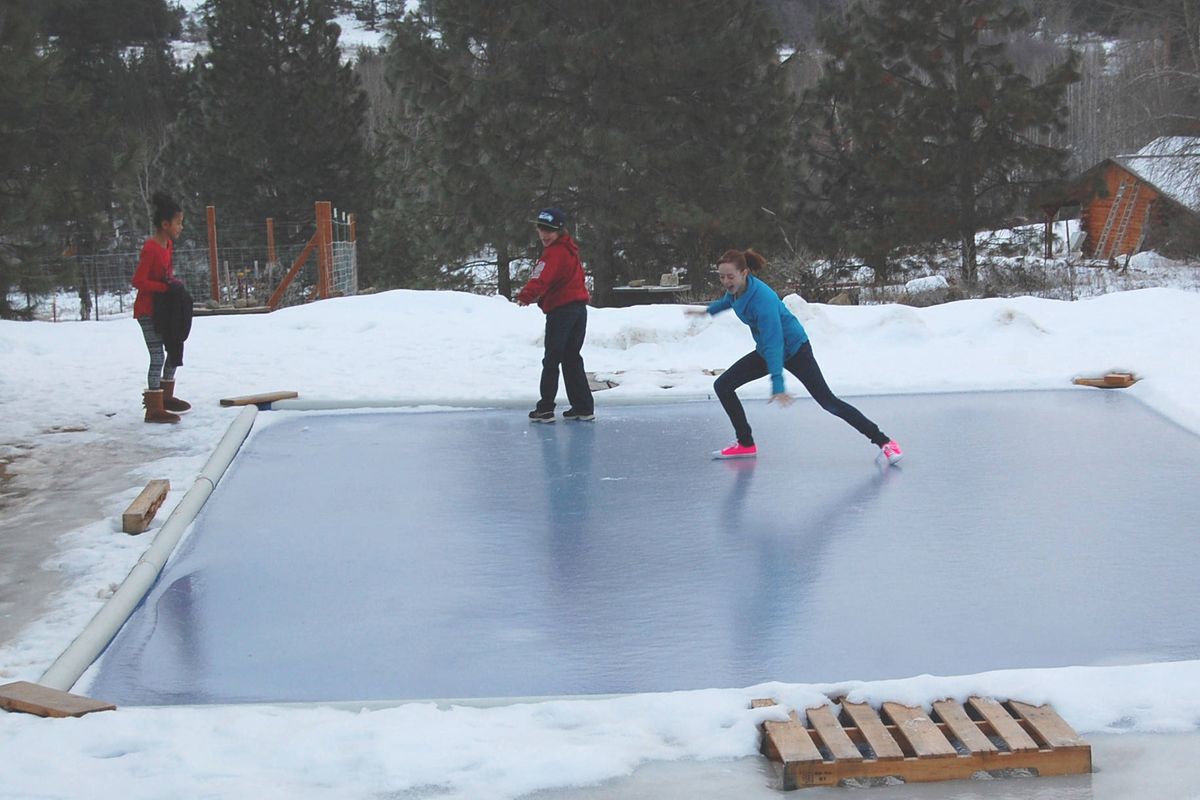
I ordered a 7-mil tarp measuring 50-by-100 feet online, then cut it in half crosswise to create two 50-by-50 foot pieces, leaving one as a backup or for next year’s rink. Placed over a 40-foot square frame, the overlap allows slack for filling the liner and provides an outside edge to build up a snowbank for additional frame support and wind buffering, which helps create smoother ice during the freezing process.
The liner caps are used to secure the liner to the framework and protect any exposed areas from damage by skates, sticks or deer hooves. Made from the same size and length PVC used to build the frame, these caps snap over the liner where it meets the framing, much like a snap bracelet does on your wrist.
With a table saw, make two longitudinal cuts, creating a 3-inch-wide channel the entire length of the cap pipe. Sand the edges with 100-grit sandpaper to avoid damage to the liner or your fingers during assembly.
Assembly
Once the site is prepared, simply push your measured sections of PVC together and frame your rink. Compacted snow in lower spots can aid in level placement, and measuring diagonally corner to corner will guarantee a square setup.
Spread and smooth the tarp out inside and across the framework, ensuring sufficient overlap on each edge and enough slack to let water grab and pull the liner as it’s filled. Once in place, carefully install the liner caps on each parallel run, taking care not to tear the material on the cut edges.
Properly assembled, only the frame corners will show any exposed liner. These can be protected later with a piece of foam or plywood cutout.
Water
Fill the rink in stages, adding only shallow layers of water between freeze times. Ice doesn’t need to be particularly thick to be usable, but filling it all at once can create undesirable surface conditions. Staggered filling allows water to freeze more quickly and helps prevent uneven, bumpy ice.
This process can take a degree of patience, of which I have a limited supply. Put someone responsible in charge for best results. With favorable temps and a little perseverance, you’ll be skating in no time.
Tools and maintenance
Maintenance is simple. While freezing temperatures remain, little needs to be done to remain in operation.
Ice scrapers are effective in removing chunks of ice from the surface after skating and playing. A piece of steel fencing connected to a push-pole can be utilized to knock the pieces free.
Buckets of warm water spread across the surface with a large squeegee are sufficient in cleaning any residue and helps smooth the finish. Experiment with different water temperatures to find best results.
Bling
For those with limitless budgets or high credit limits, there’s no end to accessorizing your skating rink.
Stadium lights can be erected for 24-hour accessibility, spectator seating and goals can be installed, hot water jets can be piped in for on-demand grooming.
Install red and blue LED rope lighting under the ice for regulation hockey lines, or convert your riding mower into a mini-Zamboni. While these options may lend a “Field of Dreams” charm to the entire setup, it can be distinctly impractical.
Simple, portable flood lights will provide plenty of light during darker hours. Tiki torches can be a unique substitute where power is unavailable, but my kids have just as much fun wearing helmet-mounted headlamps.
I’m not saying this is the safest option, but skating on ice at high speeds with razor-sharp blades attached to your feet is questionable.
A picnic table or pallet stack can provide adequate outside seating. Spray paint makes suitable lines on the ice in a pinch. Bring in a fire pit and BBQ grill and make a day of it. Anything goes. Bling it out however you see fit.
In the end, I spent less than $300 to build a nice-sized skating rink that should remain viable for four seasons. That works out to $75 per year.
Some might think the cost isn’t worth the effort. If it keeps me out of the mall, I’d say it was priceless.