Dwarf Alberta spruce brown on inside, bottom what’s wrong?

Q. My dwarf Alberta spruce, which is about 8 years old, is having some problems. It gets brown on the inside and at the bottom. It got worse through the drought but I don’t think that is the problem. It has come back but still does not look good. What should I do?
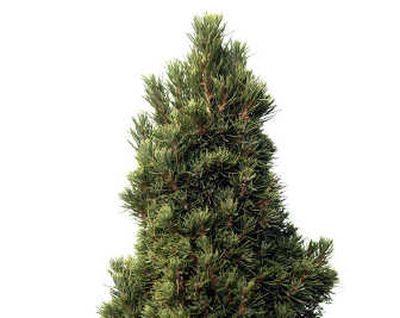
A. The dwarf Alberta spruce is a darling plant, with an interesting cone shape. It is highly susceptible to spider mites. Yours is probably suffering from the effects of high summer temperatures, our long stretches of drought and spider mites.
Spider mites are evident by webbings on the plant and a stippled or flecked appearance on the foliage that results from this pest feeding on the needles. The foliage turns yellow or brown, then falls off. This is a very common problem.
Strong streams of water once a week or so when it doesn’t rain will dislodge some spider mites, and help with the moisture problem.
Pesticides effective for spider mites will likely be required for moderate or heavy infestations. Horticultural oil will help, but must be applied thoroughly over the plant. You also will have to cut off the dead wood. Keep the plant watered and see how it develops over the coming year or so, keeping in mind that this plant grows very slowly.
If it doesn’t regain a good appearance, you will not be the first gardener to lose a dwarf Alberta spruce.
* * *
Q. I’ve got tomato vines 3 feet tall with lots of blooms but no tomatoes setting yet. What is going wrong?
A. Tomatoes do not require insects to pollinate flowers because normal swaying in the wind shakes the pollen within the flowers. This sets fruit.
However, weather can interfere with this. As a general rule, fruit set is inhibited when night temperatures rise above the mid-70s and day temperatures are above 90. When tomato flowers don’t pollinate, they drop off the plant.
Try shaking your plants in bloom, but only gently, for a few seconds a couple of times a week as blossoms develop. Whether night temperatures will drop in coming weeks to the best level remains to be seen.
Another reason is excessive nitrogen fertilizer that produced very rapid growth of stems and leaves and reduced carbohydrates required to set fruit.
Did you go overboard on fertilizer this spring?
Do your best to keep the plants evenly watered, use fertilizer strictly according to the amount and timing on the label and shake the plants a bit. Tomato plants have many months ahead of them to be productive, so you should not be discouraged in mid-June.
* * *
Just a Tip
Gardeners often yearn for a plant belonging to a friend or relative. While you can often buy one like it, it is fun and meaningful to grow one from a cutting taken starting in mid-June and into the summer.
Many broad leaf evergreens and deciduous plants, including camellias, abelias, boxwoods, daphne, gardenias, shrub roses and azaleas, are amenable to this type of propagation at this time because the wood is maturing, but not so tough that it inhibits rooting.
•Take cuttings, 4 to 6 inches long, in early morning because the stems and leaves will be less dehydrated. Take off any flowers or flower buds, so energy will be directed toward producing new roots instead of to these flowers. Make your choices also from healthy, vigorous looking parts of the plant.
•Where possible, take cuttings from side shoots instead of terminal ones. If you are traveling and the cuttings won’t be planted immediately, wrap them in a damp paper towel and store in a plastic bag kept in a cool spot.
•Make cuttings 4 to 6 inches long, take off any leaves from the lower third of the stem and dip the cut end in rooting hormone powder. If your plant has large leaves, such as a camellia, cut the leaves in half to reduce the amount of transpiration.
•Then set the cuttings in a rooting medium such as coarse sand, a mix of peat and perlite or a packaged rooting mix. You can use individual small pots or a larger pot that can hold several cuttings. Keep this mix damp during rooting and cover the planted cuttings with a plastic bag. Mist occasionally to improve humidity.
•Once the cuttings root, which will take some weeks and varies with the species, set each one in an individual small pot and take care of it with regular watering and dilute applications of liquid fertilizer. Keep the pots in a protected spot through the winter.
The young plants should be ready to plant in the landscape next spring.