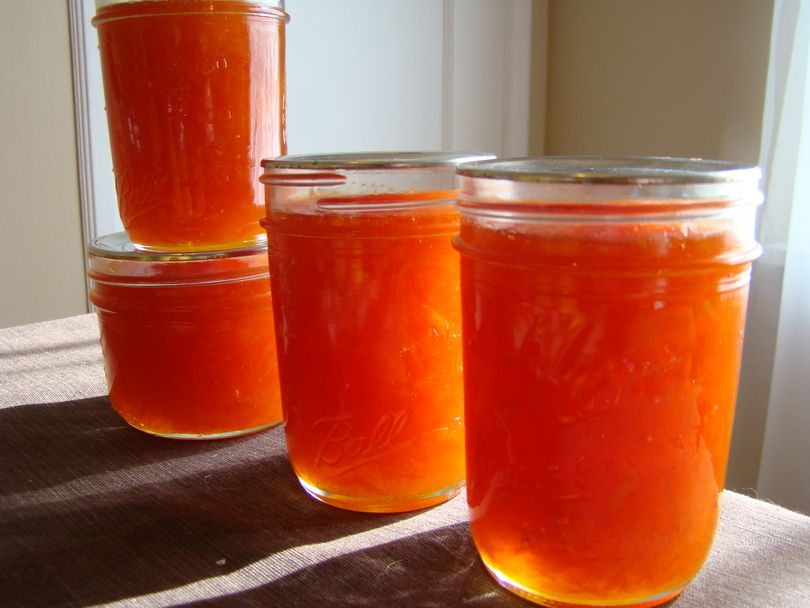
Orange-Meyer Lemon Marmalade

I wrote about my adventures with citrus last week in this post. A couple of readers have asked about my marmalade recipe/method. I had not made marmalade before this season because I simply haven’t enjoyed eating it in the past—it’s too bitter for me. This year I wanted to give marmalade a try and set out on a mission to make a marmalade for those of us who don't typically love marmalades.
I read dozens of marmalade recipes, scouring my library of preserving books for variations in technique and ingredients.
The methods for making marmalade vary pretty greatly. Many recipes include the whole fruit chopped into small slices, some simply called for zest and juice. I like the idea of using the whole fruit, but I know that citrus pith (the white bit that is directly under the colored zest) is quite bitter—so that was out. To be a marmalade rather than a jelly, I wanted to use the zest and fruit to give the finish preserve some bite, so I used small ribbons of zest and supremed (more on this below) the segments of fruit, rather than juicing it.
To reduce the bitterness further, I replaced the use of zest cooking liquid in the finished preserve with a combination of orange juice and water—I wanted the flavor of citrus but didn't want the preserve to be too sweet, so I used a 1/2 and 1/2 combination. The finished marmalade has the texture and toothsome quality of a true marmalade without the bitter edge.
The full recipe is in the extended post!
Orange-Meyer Lemon Marmalade Recipe
makes about 2 ½ pints
- 4 ½ pounds of combined oranges and lemons (I used about 3 ½ pounds of oranges and 1 pound of Meyer lemons)
- 5 cups sugar
- 2 cups orange juice
- 2 cups water
Wash and dry the oranges and lemons well. Using a vegetable peeler, remove the zest from the fruit in large strips. Stack the strips into piles of 6-8 stripes and cut them into fine confetti-like pieces (about 1/8” wide)—you should have a little more than two cups of zest. Place the zest in a large pot with about 6 cups of cold water. Bring to a boil, reduce temperature to medium high and simmer for 45 minutes or until zest is tender and the color uniform.
While the zest cooks, supreme your citrus: cut the white pith away using a sharp knife, then cut the segments of fruit away from the membranes that separate them. (For more detailed instruction, check this clip). Place your citrus segments in a bowl and set aside. Discard the pith place the membranes and any seeds in a piece of cheesecloth--these will add natural pectin to your marmelade to ensure a good set. Tie the cloth so no bits or seeds can escape into your marmalade.
Drain the zest and discard the cooking liquid. Almost every marmalade recipe you read will use this liquid in the finished product, but I chose not to for this recipe. In the past I have not been a great fan of marmalades for the very reason others love it: the bitterness. Between the chew of zest and the bitter taste of the jam, marmalade and I haven’t been best friends. To solve this, I tossed the cooking liquid and replaced it with a combination of orange juice and water. I like it!
Prepare your canning equipment. Place clean jars in your canning pot covered with water. Bring to a boil and boil vigorously for at least 10 minutes. Place lids in a small pot and cover with water; bring them to a simmer until they are needed.
In a large non-reactive pot, combine zest, fruit segments, orange juice, water, sugar, and the cheesecloth bundle. Bring to a boil and cook vigorously until the mixture reaches 220 degrees (about 30-45 minutes).
When the marmalade reaches 220 degrees (the set point for preserves) and stays at temperature for one minute, remove the pot from the heat. Remove cheesecloth bundle. Let it cool for a minute; check for set by pushing a spoon against the serface of the preserve. If it wrinkles, you have acheived set. If not, put the pot back on the heat and cook for another 2-3 minutes before checking again. Once set is achieved, let the pot cool for a minute and give the pot a good stir to distribute the zest evenly (you don’t want it to clump in the finished product).
Fill your prepared jars, wipe the rims, and apply two-part lids. Process in a boiling water bath for 5 minutes (adjust time for elevation and don’t start timing until the water reaches a full boil). When time is up remove the jars and let them cool before checking the seals.
