Tutorial: The Henny Penny apron

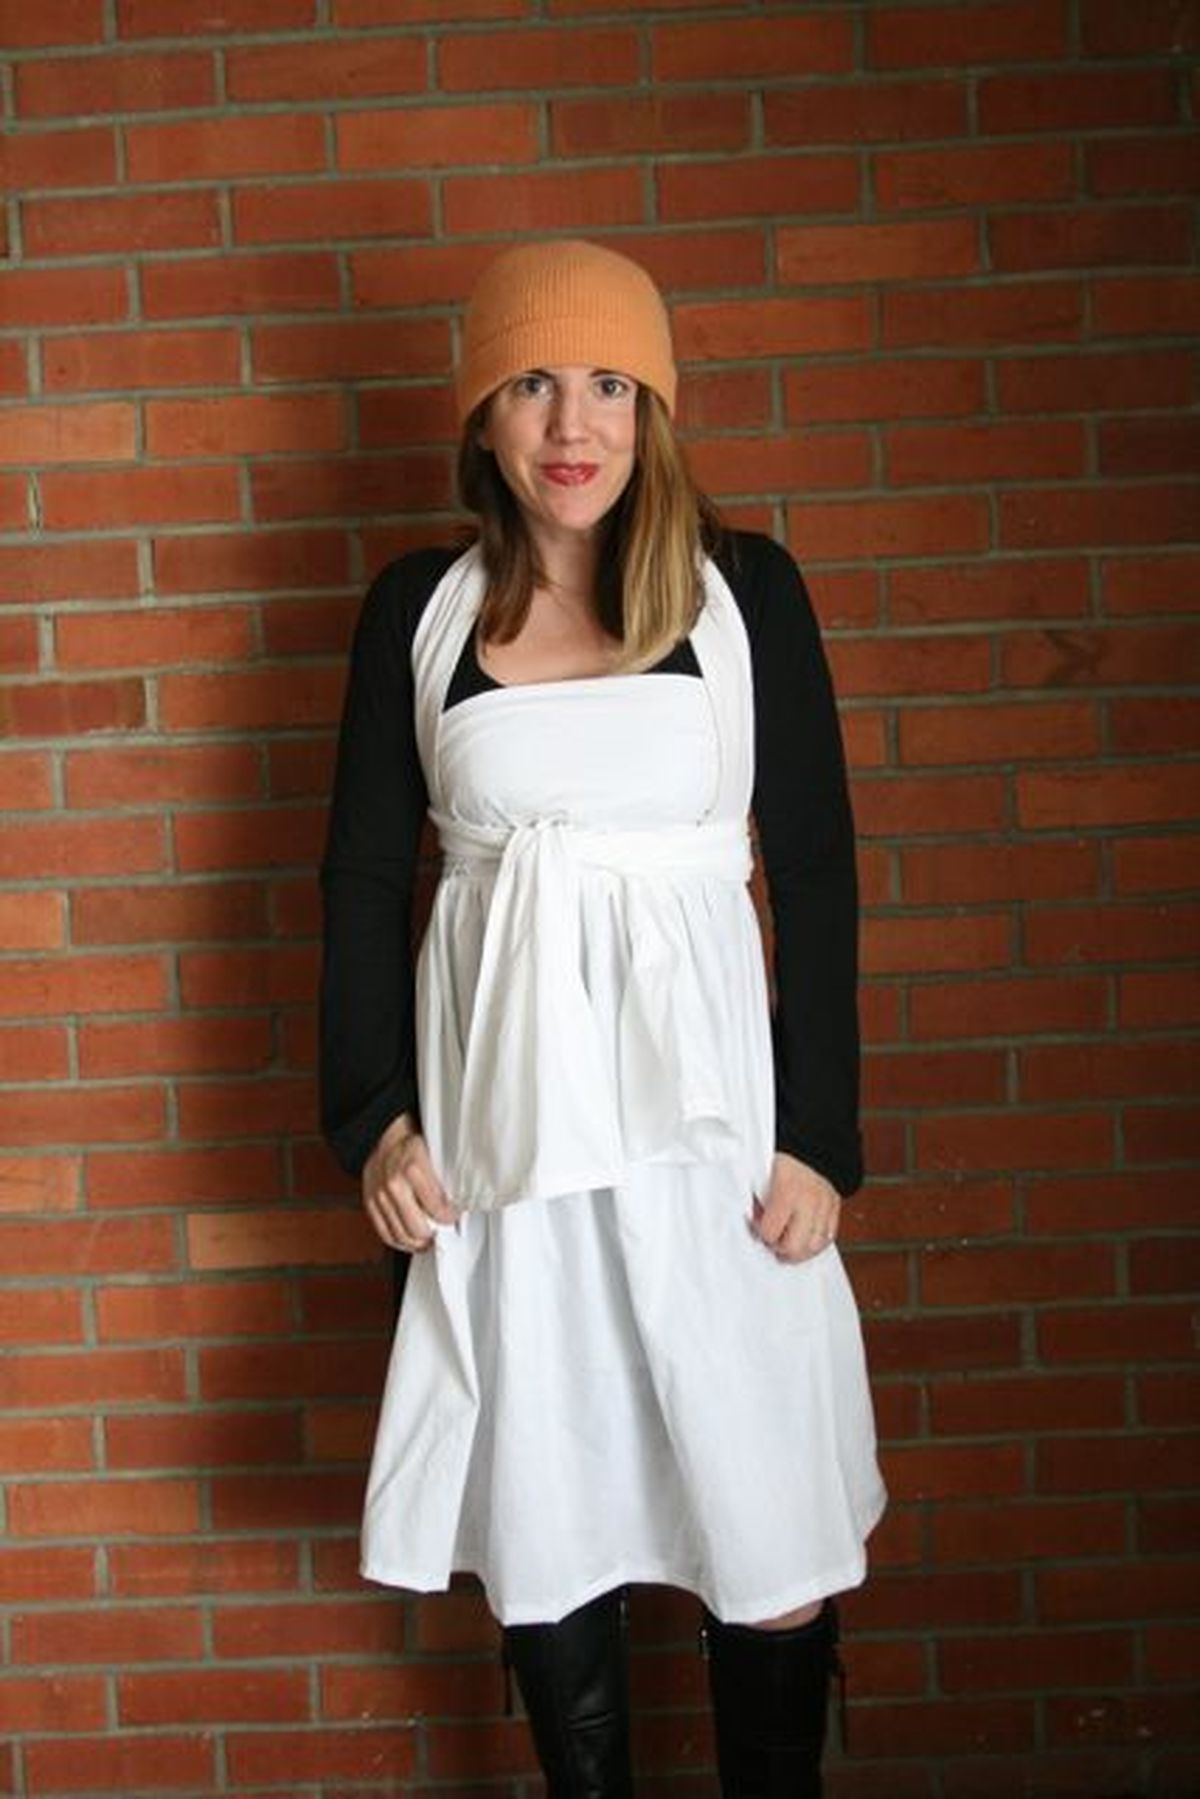
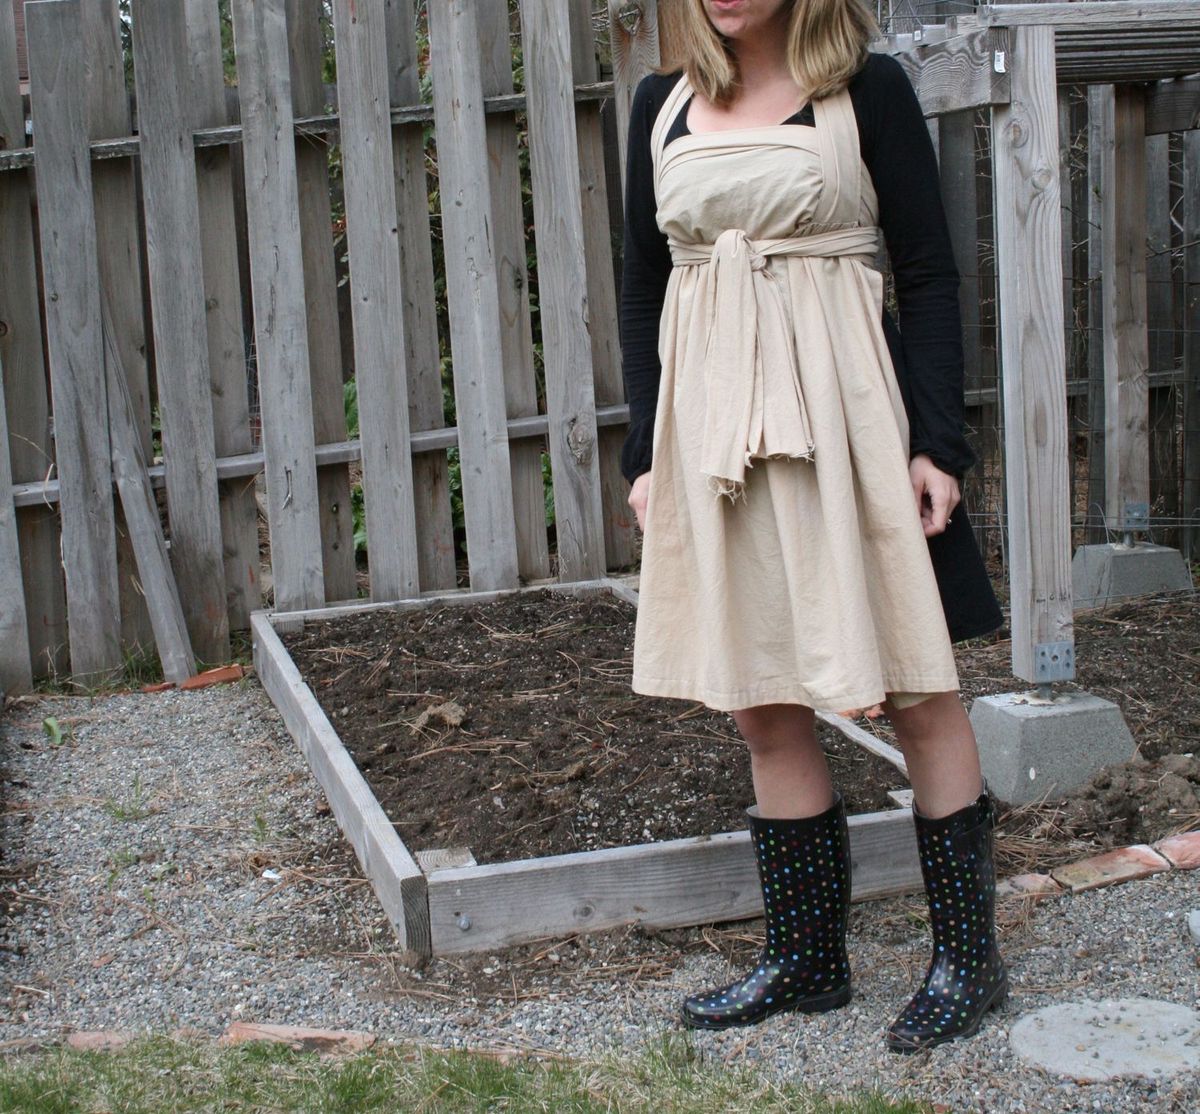


The Henny Penny apron: perfect for trips to the hen house. Or for fixing up some spaghetti for the kids. (Megan Cooley)
With so many Spokanites keeping chickens in their backyards these days, they might feel the need for a flowy, fun apron to wear on the way to the hen house.
Enter: The Henny Penny.
I just wrote up this sewing tutorial on my craft blog, and I thought it could be of use here, too. If you're looking for a comfy new apron--either for yourself or a friend (Mother's Day is just around the corner, you know), whip up one of these. It requires a good amount of fabric, but it's a quickie to stitch together.
Instructions:
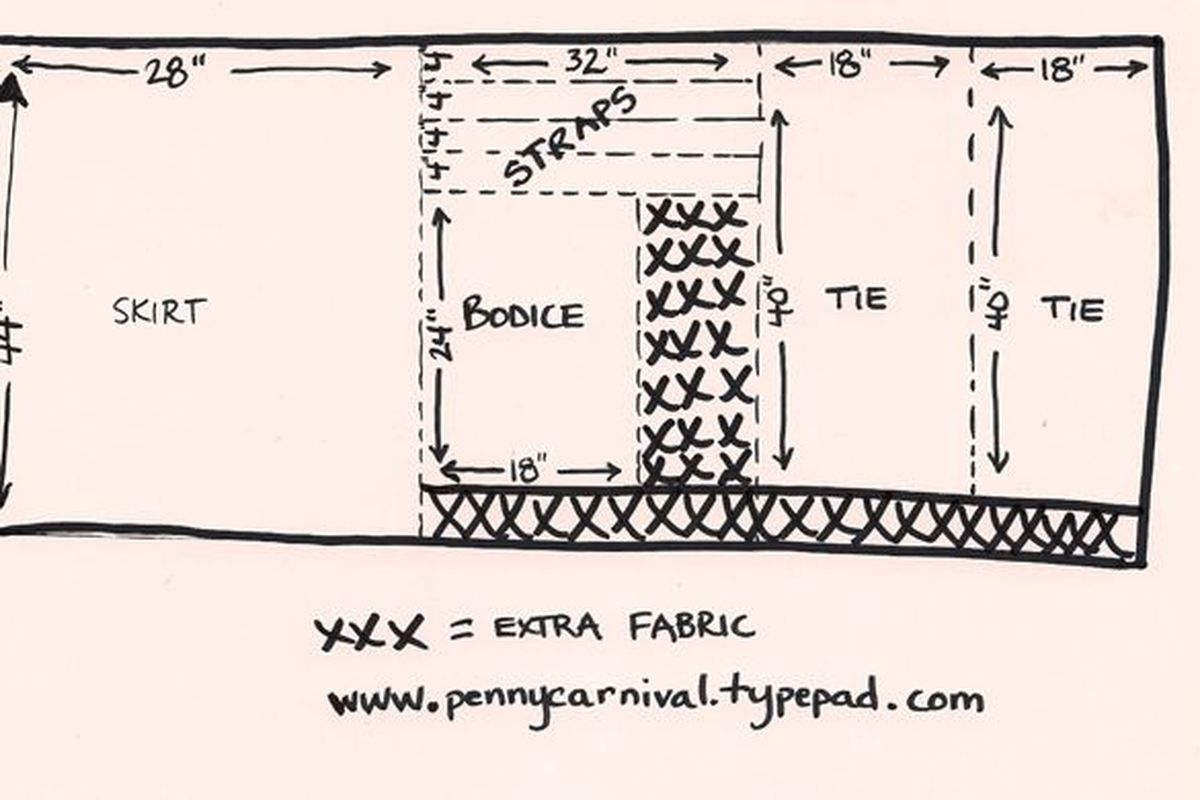
You will need 8 feet, 6 inches of fabric (2 yards, 30 inches). That allows for a little shrinkage.
I recommend 100 percent cotton muslin. In the spirit of being green, a well-worn sheet would be perfect, too.
Wash and dry the fabric. Then lay it flat and make the following cuts:
One skirt: 44 inches by 28 inches
One bodice: 24 inches by 18 inches
Two side ties: 40 inches by 18 inches
Four straps: 4 inches by 32 inches
Start by making the straps. Place two of the 16-by-32 inch pieces on top of each other, right sides facing. Stitch them together along the two long sides and one short side.
Trim away excess fabric to reduce the bulk. Now turn the strap right side out.
Use some sort of turning tool to poke the corners out as much as possible. Knitting needles work great.
Iron the strap so it lays flat. There's no need to finish the raw ends, but you can if you want.
Repeat with the other two strap pieces. Set your finished straps aside for now.
Moving on ... to the bodice and ties.
You could cut the bodice and ties out of one long piece of fabric that's 104 inches long by 18 inches wide. Dividing the bodice into three sections saves you money at the fabric store, though, and it doesn’t affect the look of the finished apron.
Set down the bodice piece on your table, right side up. Set one of the side ties on top of it, right side facing the right side of the bodice so that the two 18-inch sides line up. Pin that 18-inch side together and stitch.
Repeat with the other side tie and the other side of the bodice so you now have a piece that's 18 inches wide by about 103 inches long (a bit shorter because of the seams).
Hem around all four sides of the bodice/ties piece, folding the edges of the fabric over twice and pressing with a hot iron first so the hems don't fray.
Set aside the bodice/ties piece.
Now for the skirt.
Hem the two short sides and one long side of the skirt, just as you hemmed the bodice/ties section (by folding the fabric edges over twice, pressing and then stitching).
Set your sewing machine to the longest stitch length. Now stitch along the length of the skirt's remaining long side (the one that isn't hemmed), about 1/2 inch from the edge. This will be the top of your skirt--the part that gets attached to the bodice.
Tug on the ends of that thread to gather the skirt top. Keep tugging and gathering until the top of the skirt is now 22 inches across instead of 44 inches. Tie the two ends of the thread with double knots so the gathering you just created stays put.
You’re almost done. Let’s assemble the apron now.
1. Place the skirt on the floor or table WRONG SIDE DOWN
2. Place the straps on top of the apron so that the right side of the straps (if it matters) is touching the right side of the skirt. The straps should have a gap of 11 inches between them. The raw edges of the straps should sit slightly past the raw/gathered egde of the skirt and the sewn ends of the straps should be stretched out near the bottom/finished edge of the skirt.
3. Now place that long bodice piece on top of the straps, right side facing the straps. Center it in the middle of the skirt.
4. Pin all three layers together. Sew across all three layers twice.
Voila! Your apron is done. Now it’s time to figure out how to wear it.
How to wear the apron:
1. Hold the bodice against your chest, and then grab the straps and tie them around your neck.
2. Arrange the bodice so it drapes across your chest the way you want it to. Pull the bodice ties behind you, criss cross them behind your back, then bring them tightly around front again. Tie the ties in a double knot in front. They should be partially covering the straps that go up around your neck.
Let me know if you make one! I'd love to post photos of your creations here.