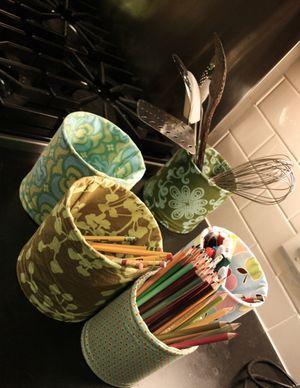
Tutorial: repurposing tin cans
When a lot of people think of the green movement, the first thing that comes to mind is recycling. Aluminum. Paper. Plastic. Whatever.
Being green also is about reusing what you already have. Sometimes that means giving new purpose to an everyday object.
Like cans.
It drives my husband crazy, but I’m a can saver. If I buy a giant can of tomatoes, I wash that can clean and find a new life for it.
Lately that has meant sewing slipcovers for them. Once covered, I use the cans to hold just about anything—cotton balls, pencils, cell phones and keys.
I first saw this idea at Elsie Marley, an inspiring blog written by a mom named Meg.
Meg embroiders kitchen and craft motifs—such as whisks and scissors-- and then uses that fabric to cover the can’s unsightliness. Her finished projects are darling, like something you would see in a kitchen in France. Not that I've ever been to France, but until I go I'll assume that every kitchen there is romantic and charming.
My twist on covered cans isn’t nearly as dreamy as Meg’s, but it’s a quick and easy way to give new life to an otherwise unwanted object.
You can read the steps below or click here for a slideshow that walks you through the steps, photo by photo. Just hover over the bottom of each picture and a caption should appear.
Covered cans tutorial:
-First, wash, clean and dry your can.
-Measure the circumference and height of the can. Cut a rectangle of fabric that is as wide as the circumference, plus a half inch, and is about double the height.
-Hem the sides of the fabric that correspond with the top and the bottom of the can.
-Fold the fabric lengthwise (i.e., the height) so the right sides are facing. Sew the unfinished side together with a ¼-inch seam.
-Turn this tube you have made right side out and slip it over the can. Stuff the other half of the tube inside the can.
-Fill it with any small object that needs a home in your house.

